Introduction
As part of a program through my University and CoderdojoWA I’ve been asked to oversee a project relating to image manipulation in Python using the Python Image Library. While I wasn’t the one to write the guide, I have been asked to test and confirm I understand it well enough to be able to teach the content this coming February.
Base Code + Image
The following code was written with PIL (Python Imaging Library) that is currently only supported officially on Python2.7. Below is the base code that we will be using throughout the course of this lesson.
#!/usr/bin/env python
# Include some open-source code to help us load the images
from PIL import Image
# This is the code that does the actual filtering. We should replace
# filter_name with the name of our filter, but keep in mind that
# *it must match up with the filter_name used below!*
def filter_name(img):
# Get the width and height (number of columns and rows) of the image
width, height = img.size
# Make a copy of the image so that we don't write over the original data.
new_img = img.copy()
# PUT YOUR CODE HERE
return new_img
# The entry point for our application. This is where the computer will
# begin running our code.
if __name__ == '__main__':
# Open the image file and read in its data so that we can access it
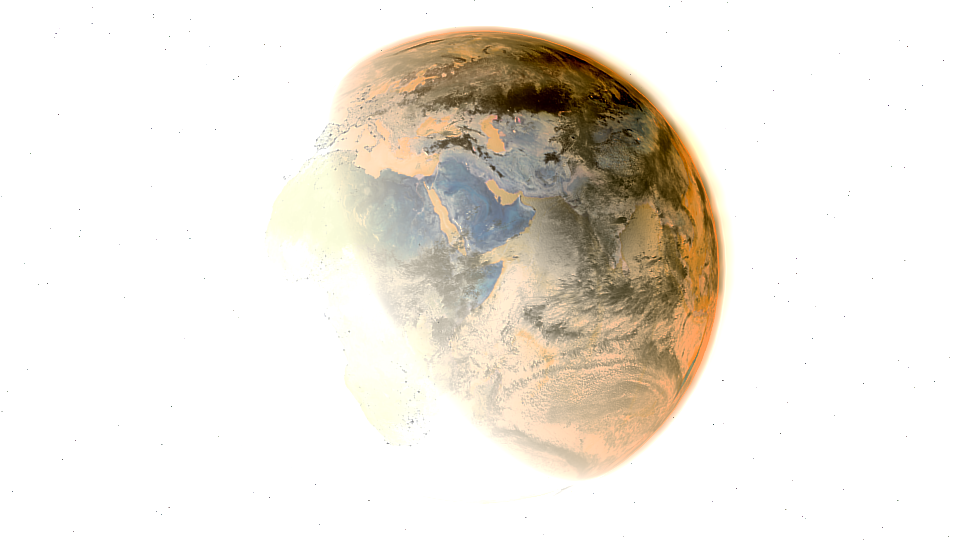
img = Image.open('EarthRender.bmp')
# Run the code for the filter. We should replace filter_name
# with the name of our filter.
new_img = filter_name(img)
# Save the image file so that we can view it
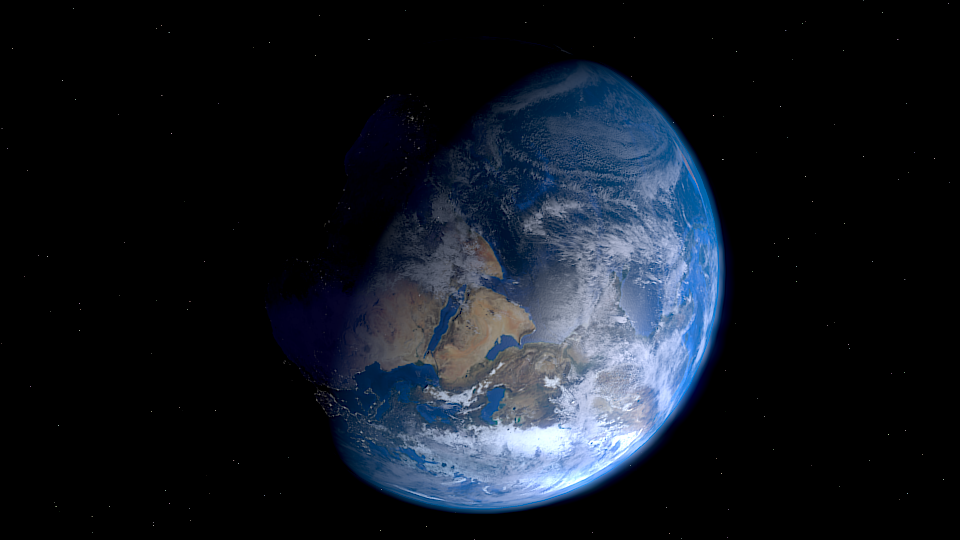
new_img.save('OutputImage.bmp')Below is the image we’ll be using to test; If you’d like to use your own, try to pick a 24-bit BMP for the best results.

You can find the original copy that was rendered by Wikimedia user Tesseract2 Here.. The copy on that site is not in the correct format. You can convert the image by opening it in GIMP and exporting as Windows BMP.
Once you have the EarthRender.bmp in the same folder as your base code; run it using the following command from your terminal
python2 filter.pyThe code now will export an identical copy of the original BMP file but with the new name OutputImage.bmp.
The rest of the tutorial will demonstrate the methods required to manipulate images in a number of different ways. Simply add the new function into your code and change the new_img = filter_name(img) line in your __main__ to match the method you’d like to execute.
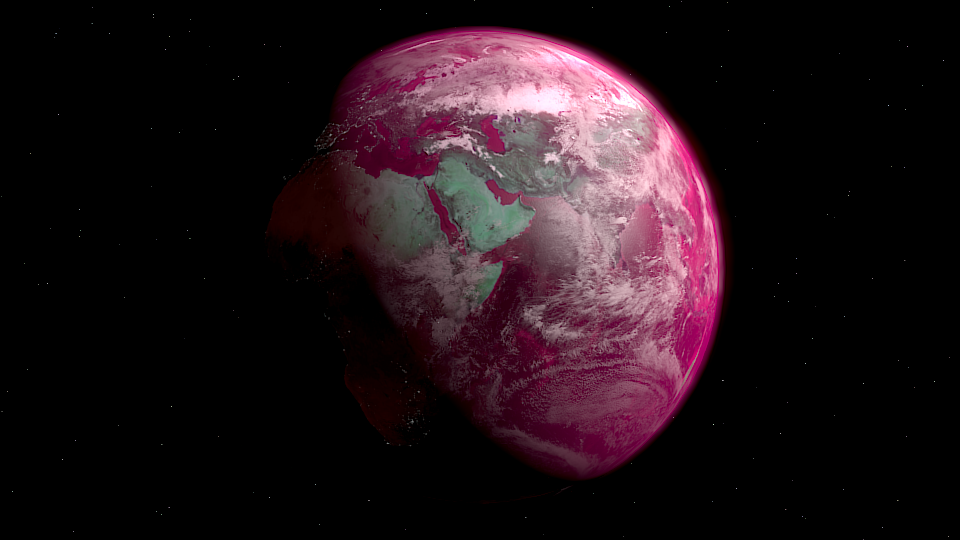
Invert
def invert(img):
    width, height = img.size
    new_img = img.copy()

    for x in range(width):
        for y in range(height):
            red, green, blue = img.getpixel((x,y))
            new_red = 255 - red
            new_green = 255 - green
            new_blue = 255 - blue
            new_img.putpixel((x,y), (new_red, new_green, new_blue))

    return new_img
Mask (Black and White)
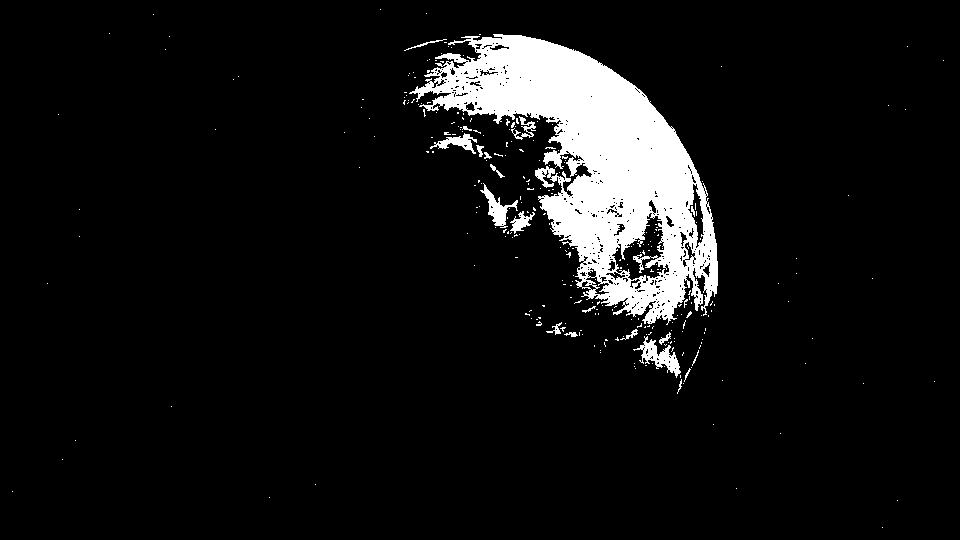
def mask(img):
    width, height = img.size
    new_img = img.copy()

    for x in range(width):
        for y in range(height):
            cur_pixel = img.getpixel((x,y))
            average = sum(cur_pixel) / 3.0

            if average < 128:
                average = 0
            else:
                average = 255

            new_img.putpixel((x,y), (average,)*3)

    return new_img
Grayscale
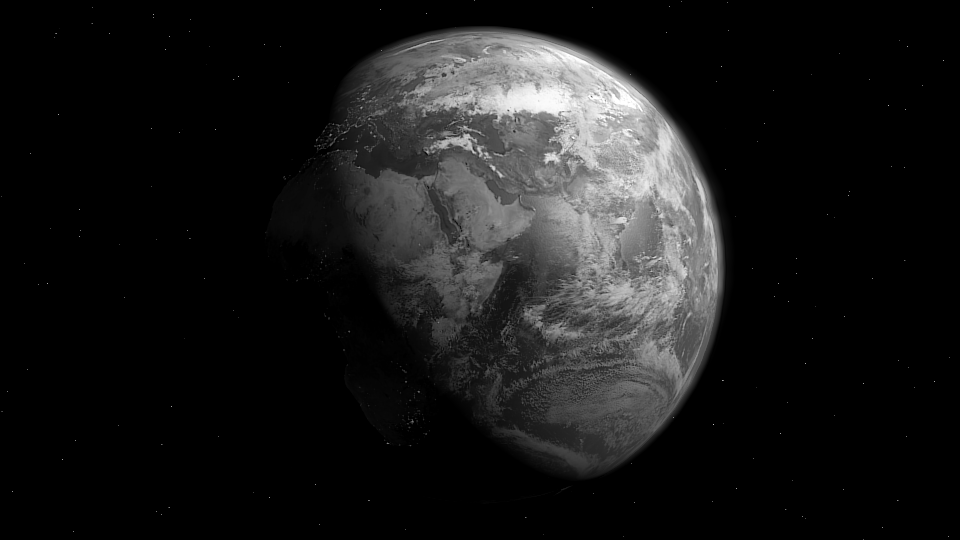
def greyscale(img):
    width, height = img.size
    new_img = img.copy()

    for x in range(width):
        for y in range(height):
            cur_pixel = img.getpixel((x,y))
            average = sum(cur_pixel) / 3
            new_img.putpixel((x,y), (average,)*3)

    return new_img
Sepia Tone
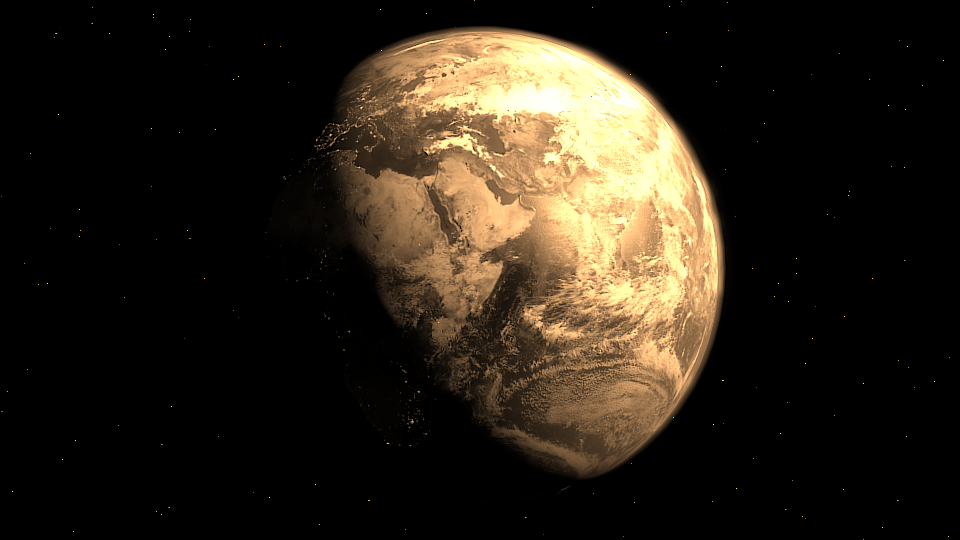
def sepia(img):
    width, height = img.size
    new_img = img.copy()

    for x in range(width):
        for y in range(height):
            red, green, blue = img.getpixel((x,y))
            new_val = (0.3 * red + 0.59 * green + 0.11 * blue)

            new_red = int(new_val * 2)
            if new_red > 255:
                new_red = 255
            new_green = int(new_val * 1.5)
            if new_green > 255:
                new_green = 255
            new_blue = int(new_val)
            if new_blue > 255:
                new_blue = 255

            new_img.putpixel((x,y), (new_red, new_green, new_blue))

    return new_img
Swap Channels
def swap_channels(img):
    width, height = img.size
    new_img = img.copy()

    for x in range(width):
        for y in range(height):
            red, green, blue = img.getpixel((x,y))
            new_img.putpixel((x,y), (blue, red, green))

    return new_img
Flipping
def flip(img):
    width, height = img.size
    new_img = img.copy()

    for x in range(width):
        for y in range(height):
            new_img.putpixel((x, y), img.getpixel((x, height - y - 1)))

    return new_img
Mirroring
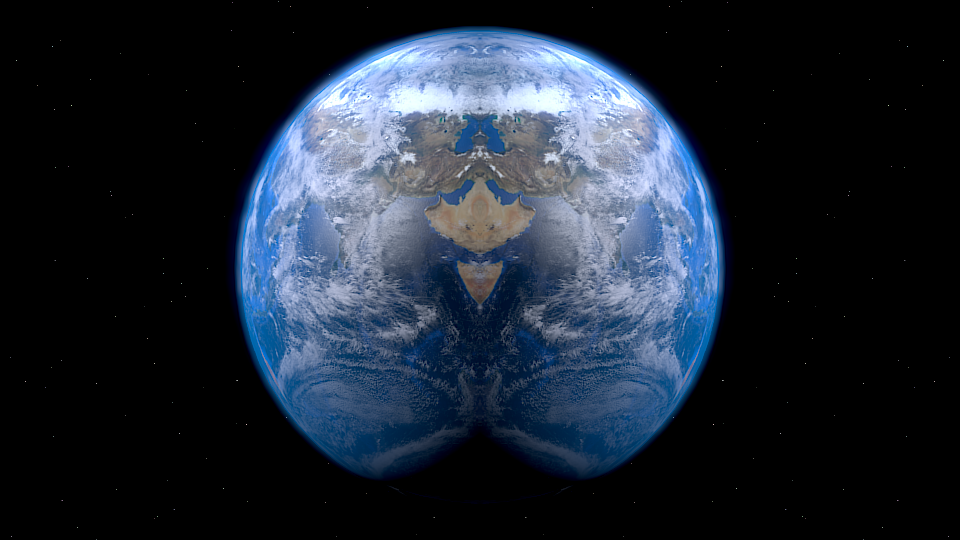
def mirror(img):
    width, height = img.size
    new_img = img.copy()

    for x in range(width / 2):
        for y in range(height):
            new_img.putpixel((x, y), img.getpixel((width - x - 1, y)))

    return new_img
Contrast

def contrast(img):
    width, height = img.size
    new_img = img.copy()

    for x in range(width):
        for y in range(height):
            func = lambda v: v / 2 if v < 128 else v * 2
            red, green, blue = img.getpixel((x, y))

            red = func(red)
            if red > 255:
                red = 255
            green = func(green)
            if green > 255:
                green = 255
            blue = func(blue)
            if blue > 255:
                blue = 255

            new_img.putpixel((x, y), (red, green, blue))

    return new_img
Get Block Average Function
For the remaining tasks we’ll be utilizing the following function. Be sure to add it into your project so we can reference it.
def get_block_average(img, x, y, block_size):
    """A helper function to return the average of the pixels
    in an block_size * block_size square at position x, y.
    Won't read past the edges of the image. """

    #Ensure we don't read past the edges
    if x < 0:
        x = 0
    if y < 0:
        y = 0
    end_x = min(img.size[0], x + block_size)
    end_y = min(img.size[1], y + block_size)

    #Get all of the pixels in the block into a list
    pixel_list = []
    for x in range(x, end_x):
        for y in range(y, end_y):
            pixel_list.append(img.getpixel((x, y)))

    #Sum all of the components (seperately)
    sums = reduce(lambda a, b: (a[0] + b[0], a[1] + b[1], a[2] + b[2]), pixel_list)

    #Return averages
    return (sums[0] / len(pixel_list),
            sums[1] / len(pixel_list),
            sums[2] / len(pixel_list))
Blur
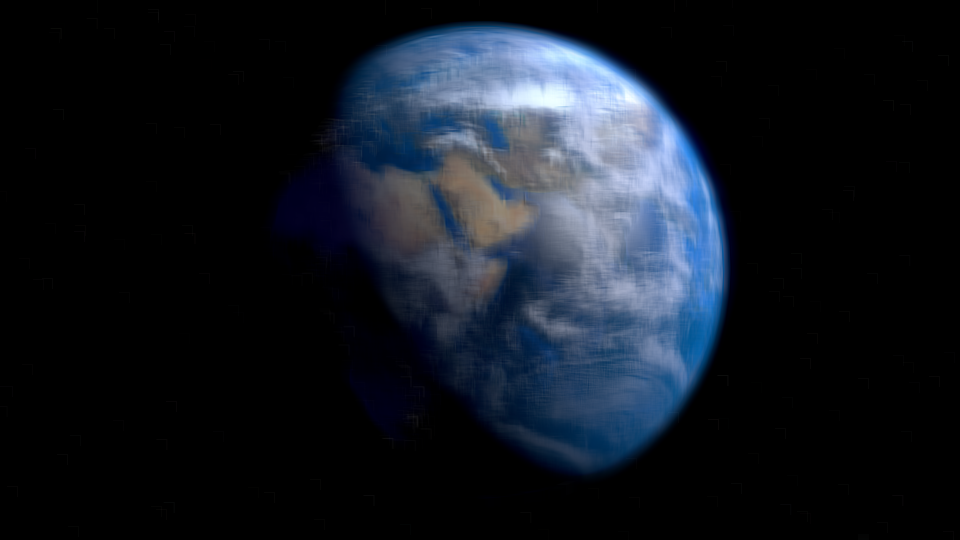
def blur(img):
    width, height = img.size
    new_img = img.copy()

    for x in range(width):
        for y in range(height):
            new_img.putpixel((x, y), get_block_average(img, x - 5, y - 5, 11))

    return new_img
Stark Lines
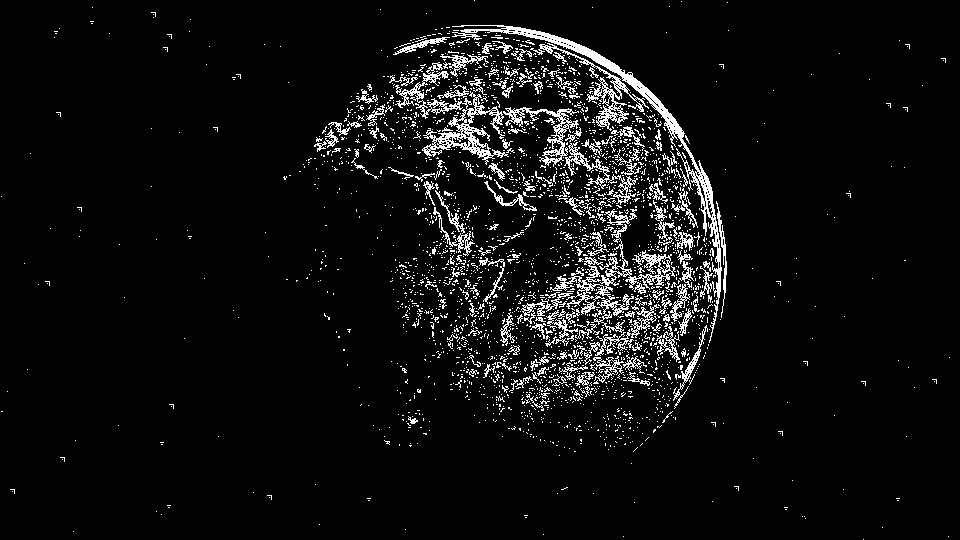
def line(img):
    width, height = img.size
    new_img = img.copy()

    for x in range(width):
        for y in range(height):
            ave_red, ave_green, ave_blue = get_block_average(img, x - 2, y - 2, 5)
            red, green, blue = img.getpixel((x, y))

            edge = False
            if abs(red - ave_red) + abs(green - ave_green) + abs(blue - ave_blue) > 45:
                edge = True

            pixel = (255, 255, 255) if edge else (0, 0, 0)

            new_img.putpixel((x, y), pixel)

    return new_img
Pixelize
![]()
def pixelize(img):
    pixel_size = 16

    width, height = img.size
    new_img = img.copy()

    for x in range(width):
        for y in range(height):
            near_x = x - (x % pixel_size)
            near_y = y - (y % pixel_size)
            new_img.putpixel((x, y), get_block_average(img, near_x, near_y, pixel_size))

    return new_img
Image Synthesis
Finally we can actually generate our own images using this library. Here’s an interesting one that uses XOR
def xor_synth(img):
    new_img = Image.new('RGB', (1000, 500))
    width, height = new_img.size

    for x in range(width):
        for y in range(height):
            val = (x ^ y) % 255
            new_img.putpixel((x, y), (val,)*3)

    return new_img