Introduction
Now that we’ve learnt how to generate a project using Yeoman, we’ll do the same thing using Visual Studio 2015. While VSCode and Yeoman are great ways to create projects, they can be limited with it comes to development.
Setting up your project
Open Visual Studio 2015 and navigate to the Extension and Updates list. We’ll be using a number of extensions to help make life easier; I would recommend installing them:
Add New File - Allows you to create a blank file very quickly
Web Essentials 2015.1 - Used quite about for the web application development. Just install the latest version available
Open Command Line - Opens a command line quickly in your project
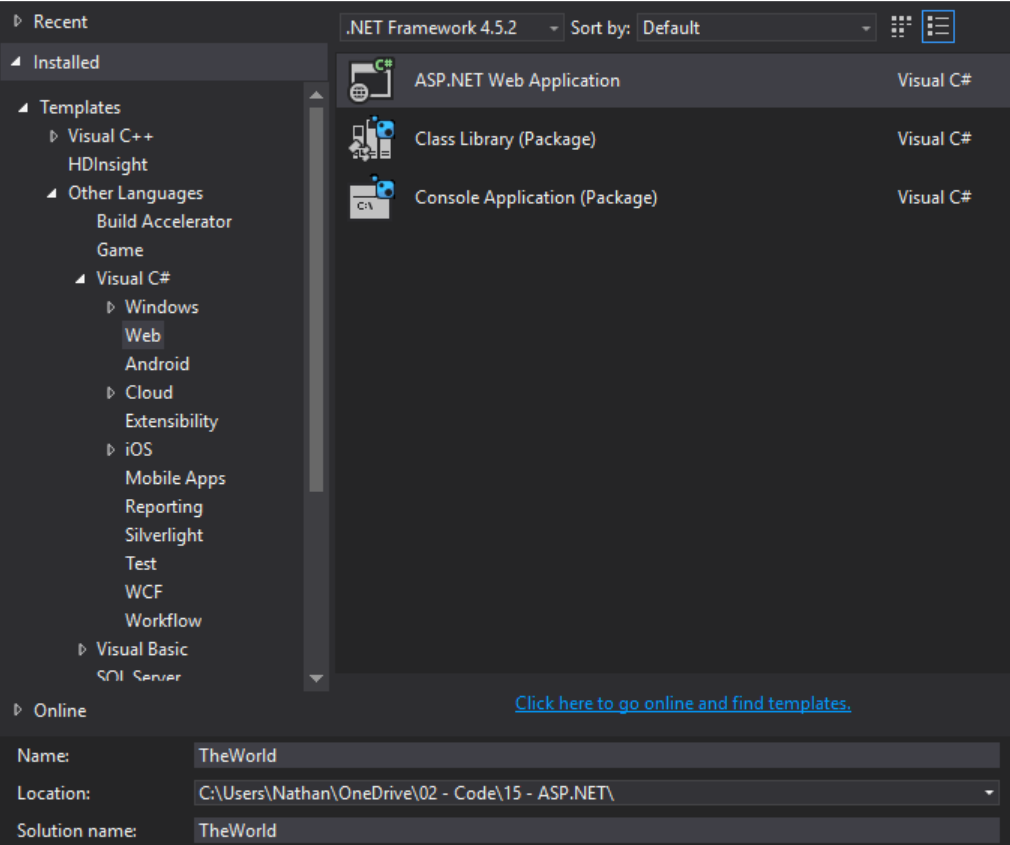
Proceed to create a new C# Project and select the ASP-NET Web Application template under the Web sub heading. Name your project TheWorld again and save it to your working directory (Don’t try to install it in the same directory as your Yeoman one).
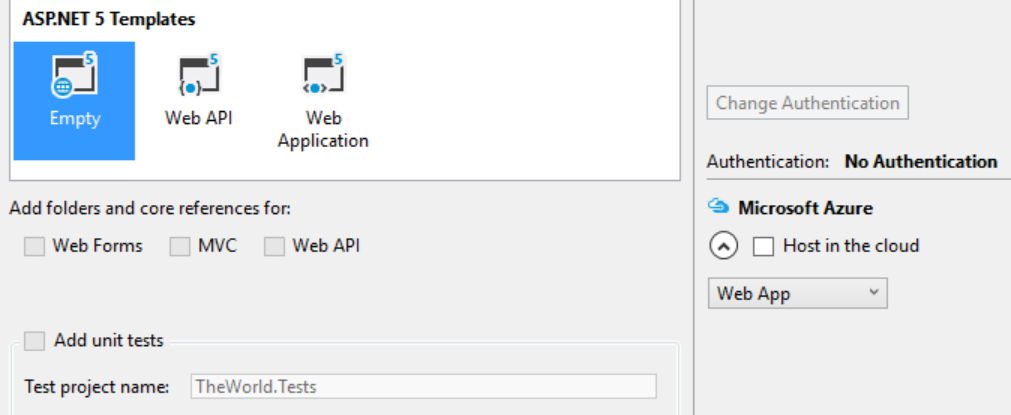
You will now be asked to select a template. Normally we would select the Web Application under ASP.NET 5 Templates, however we want to learn how this all comes together; so we’re going to select the Empty template for now.
You might also want to uncheck Host in the cloud.
OK the build of the project and once it has been generated, open up the project.json file again. You will immediately see that it’s much more trimmed down then the one created with Yeoman in the previous tutorial because we used the Empty project template.
{
  "version": "1.0.0-*",
  "compilationOptions": {
    "emitEntryPoint": true
  },

  "dependencies": {
    "Microsoft.AspNet.IISPlatformHandler": "1.0.0-rc1-final",
    "Microsoft.AspNet.Server.Kestrel": "1.0.0-rc1-final"
  },

  "commands": {
    "web": "Microsoft.AspNet.Server.Kestrel"
  },

  "frameworks": {
    "dnx451": { },
    "dnxcore50": { }
  },

  "exclude": [
    "wwwroot",
    "node_modules"
  ],
  "publishExclude": [
    "**.user",
    "**.vspscc"
  ]
}
A big thing to look out for is to make sure that you’ve got the correct ASP.NET runtime installed. If you have a look at the entries under dependencies; just make sure that they end in 1.0.0-rc1-final. If they don’t, or have a previous version; check back at my previous guide and follow the instructions to install the latest runtime.
Startup.cs
Have a look at the Startup.cs file below.
using System;
using System.Collections.Generic;
using System.Linq;
using System.Threading.Tasks;
using Microsoft.AspNet.Builder;
using Microsoft.AspNet.Hosting;
using Microsoft.AspNet.Http;
using Microsoft.Extensions.DependencyInjection;

namespace TheWorld
{
    public class Startup
    {
        // This method gets called by the runtime. Use this method to add services to the container.
        // For more information on how to configure your application, visit http://go.microsoft.com/fwlink/?LinkID=398940
        public void ConfigureServices(IServiceCollection services)
        {
        }

        // This method gets called by the runtime. Use this method to configure the HTTP request pipeline.
        public void Configure(IApplicationBuilder app)
        {
            app.UseIISPlatformHandler();

            app.Run(async (context) =>
            {
                await context.Response.WriteAsync("Hello World!");
            });
        }

        // Entry point for the application.
        public static void Main(string[] args) => WebApplication.Run<Startup>(args);
    }
}
The final line is the Entry point for the application (hence the definition Main). This will run a WebApplication using an instance of the Startup class. This start up class is created once and only once when the web application is started.
It does two things:
-
Calls
ConfigureServices- which is a way to setup dependency injection containers -
Calls
Configure- contains a list of things that are going to run as a request comes in and as a response goes back out.- Within configure we call
app.UseIISPlatformHandler();which is middleware that integrates with IIS. We’re going to go ahead and get rid of that though. Also delete"Microsoft.AspNet.IISPlatformHandler": "1.0.0-rc1-final"from theproject.jsonfile app.Runcontains a little piece of code that runs each time a new request comes in.
- Within configure we call
Running our App
If you have a look in the menu above our project you’ll see a green arrow with IIS Express next to it. This is how we will be running/debugging our web app. If you click the small black arrow pointing down you’ll be greeting with a couple options asking how we want to run our code.
You’ll recognize the web option from my previous tutorial. From this point onwards however we will be using IIS Express instead.
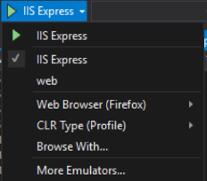
You can also specify what web browser you want to use. In my examples I’ll be using Microsoft Edge as it doesn’t have any plugins that might interfere with our application.
Also open the properties menu for the project by right clicking and selecting Properties on TheWorld in the project browser and then click the Debug menu. Here we can be more specific how we want to run our App. I’ve changed the App URL to the following to make it easier to remember the port:
http://localhost:8000/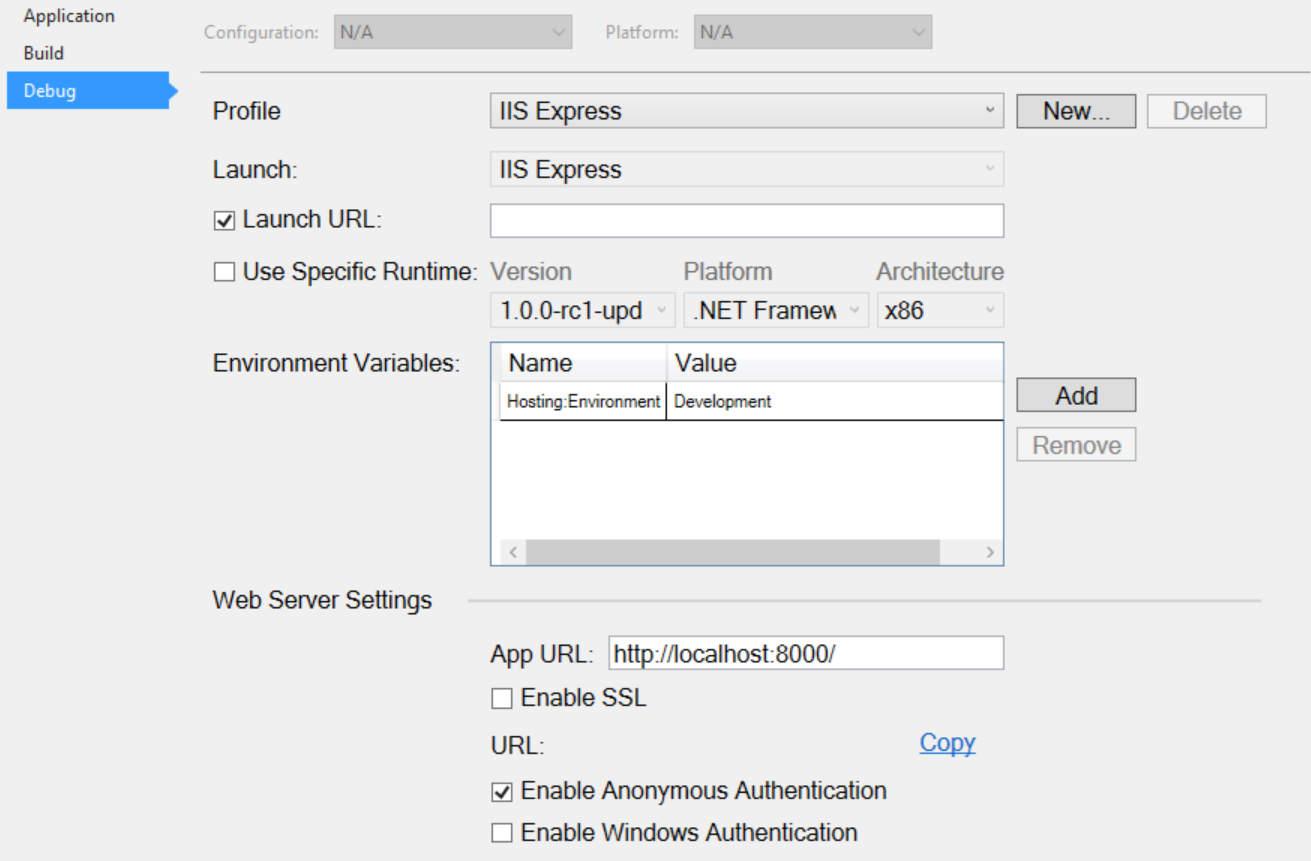
Now simply save all the working files and click the green arrow in the menu to launch our App. BAM! A browser should spring open and greet you with Hello World!
You can now navigate to any sub path of localhost:8000 and you’ll always be greeted with Hello World! as we’ve specified that any request to our web server responds only with Hello World!.
You can test this theory by changing the await context.Response.WriteAsync("Hello World!"); line of code to the following:
await context.Response.WriteAsync($"Hello World: {context.Request.Path}");Build and run your app again and try to navigate to various subpages on your site. For example http://localhost:8000 will return Hello World: / while http://localhost:8000/foo/bar returns Hello World: /foo/bar
This is called middleware! We’ll be working with a lot of things like this in the following tutorials.
Summary - What have we learnt?
So far we’ve covered the installation and basic use of ASP.NET and familiarized ourselves with different ways of generating and creating .NET projects. All the code we have used and are going to use is completely open source so we can dig around and understand exactly what’s going on. You can actually check out the entire .NET Core framework on github.
If you’ve enjoyed this so far be sure to let me know, I would love some feedback. I would like to mention that this entire course is based off a Pluralsight training video series by Shawn Wildermuth and I would highly recommend checking it out.